Lunch Hour Crafts #5- Mug Rugs
Ah, finally. The long-awaited tutorial explaining how to make mug rugs, otherwise known as “fabulously small and consequently easy to manage quilts”. Sorry for the delay…I’ve been busy crafting up a storm for some upcoming weddings.
Let’s review- a mug rug is essentially a tiny little quilt, just the right size to use as a coaster for your drink with a cute place to lay a few cookies. This craft allows you to learn the basics of quilting without the intimidation of a huge project. I’d say a 7″x5″ quilt is manageable for just about any crafter.
To begin, you’ll need:
– two pieces of fabric (7″x5″ each)
– one piece of thin batting (7″x5″)
– one piece of plain white cotton (7″x5″)
– fabric for binding (about 30″)
– sewing machine, needle, thread, scissors, ruler
Step 1. Assemble materials. Cut your fabric and batting accurately.
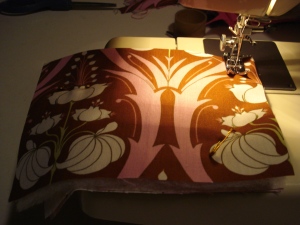
Step 2. Make a “quilt sandwich”. This is an appetizing way of describing the four layers of quilted fabric that you’ll finish with. Place the back of your mug rug (fabric #1) face-down on the table. Lay the batting and the white cotton directly on top, lining up all the edges. Place the top of your quilt (fabric #2) face-up on the batting. You should have 4 layers, all 5″x7″, perfectly lined up. Secure the whole sandwich carefully with straight pins or safety pins.
Step 3. Quilt your sandwich. Quilting means stitching through all 3 layers to hold them together forever, a beautiful union of fabric and batting. The easiest way to quilt would be to sew a few straight lines directly across from one end to the other. You could get much more complicated than this if you’re comfortable with it. For now, check out Amy’s Creative Side or Tallgrass Prairie Studio for more tips and hints on how to quilt like a pro. Most of all, just try it out. These mug rugs are so small that if you make a mistake, you really haven’t ruined much (unlike a queen sized quilt top…) and mistakes add character to your crafts. Don’t be afraid!
Step 4. Add binding. This seems intimidating, but it really isn’t. The process I used which involves finishing the binding by hand can be found all over the place- I think this tutorial is excellent and easy to understand. Check it out!
That’s it! Of course, once you’ve made one it will be hard to keep from making more.

The 3 mug rugs that I made are available in my Etsy shop– just think, your mugs could reside on my mug rugs! How great is that? Better yet- you can buy my mug rugs and the proceeds all go to Safe Refuge (new website coming soon!), helping women and kids in the Philippines. They make a great hostess gift for the next barbecue you attend.


Trackbacks